
"Using basic framing lumber, we knew we’d have knots and small defects to deal with and that everything might not line up perfectly, but our design was simple and didn’t require perfection."
Materials
Today we’re building a headboard out of lumber and plywood. We weren’t after anything fancy and decided to use basic, construction-grade lumber for most of the project, which lent itself the look we were after. Using basic framing lumber, we knew we’d have knots and small defects to deal with and that everything might not line up perfectly, but our design was simple and didn’t require perfection.
The “backbone “of our headboard is a piece of plywood. We picked a grade that had one smooth face/side on it. This isn’t necessary since one side will be covered with paneling and the other side is generally against a wall, but we wanted a smoother back. For our full-size bed, we had Dunn Lumber cut the plywood to 34-1/2” high by 55” wide.
If you’re mounting your headboard to a bed frame you’ll want to measure the width of the frame. Measure the distance, center to center, of the holes of the bedframe that the legs of your headboard will be bolted into. This width is going to be the same measurement as the width of your plywood. For our bedframe, the distance was 55”, and so we had Dunn Lumber cut the full sheet down to 55” wide and 34-1/2” tall.
Step 1: Where to Start
Our first step in assembly was to screw one of the upright, vertical legs of the headboard to one of the short sides of the plywood. These legs are made up of the 2" x 3" cut in half. We lapped the plywood about halfway over the width of the 2" x 3" and positioned the plywood evenly with the top of 2" x 3" leg. It’s important to mount this parallel to the plywood edge, so measure and mark the overlap and screw into place down the length of the plywood. We secured the plywood to the 2" x 3" using 1” screws driven through the plywood into the 2"x 3". (This way the heads of the screws will be on the backside of the headboard.)


Step 2: Glue the Tongue and Groove in Place
The next step was gluing our tongue and groove (T&G) paneling to the plywood. The paneling comes in a package with boards that are 96” long, and we had Dunn Lumber cut the boards into 32” pieces. You can cut these yourself with a handsaw or a chop saw. The cut ends will be hidden on the final product, so a perfectly straight cut and a perfectly smooth cut end are not essential to this design.The tops of the T&G boards were lined up with the top of the plywood, and the plywood will overhang the T&G boards at the bottom edge of the plywood.
To glue the T&G paneling down, we used DAP SmartBond Construction Adhesive. It’s a new type of glue that is a no-VOC aerosol polyurethane glue. If you've never used this product before make sure to test it first as it behaves differently than you might expect. After a few practice beads laid onto scrap wood, we were off and running. With two people, we were able to press the boards into place on the plywood backing, fitting the tongue and groove sides together. If your boards don't lay flat, you can put books—or anything heavy—on them to weigh them down while the glue dries.
According to the instructions on the can, this aerosol glue has an ‘open time’ of eight minutes and dries fully in 24 hours. This means you have about eight minutes—plenty of time—to get your boards placed and repositioned if necessary.


Step 3: Attach the Other Leg
Now we’re ready to mount the other leg of the headboard.
Snug the other 2" x 3" up against the last piece of T&G paneling. Measure the distance between the two legs at both ends of the 2" x 3" and make sure it’s the same, so the two legs will be parallel to each other. Then, screw the second 2"x 3" into place, just as you did the other leg ,using screws through the backside of the plywood into the 2" x 3".
Note: You've now assembled the two, vertical legs of your headboard. The distance between the two the legs should match the distance between the holes of your bed frame if you're going to attach the two together at the end.

Step 4: Mount the Horizontal Pieces
The next step is to cut a 2" x 4" to span the width of the headboard between the legs at the bottom of the T&G boards. Measure the width you need, cut to length, and then mount it horizontally directly under the bottom of the T&G boards. Because the plywood is taller than the T&G boards, you’ll have an overlap and be able to screw this 2" x 4" into place just like you did with the vertical legs of the project.
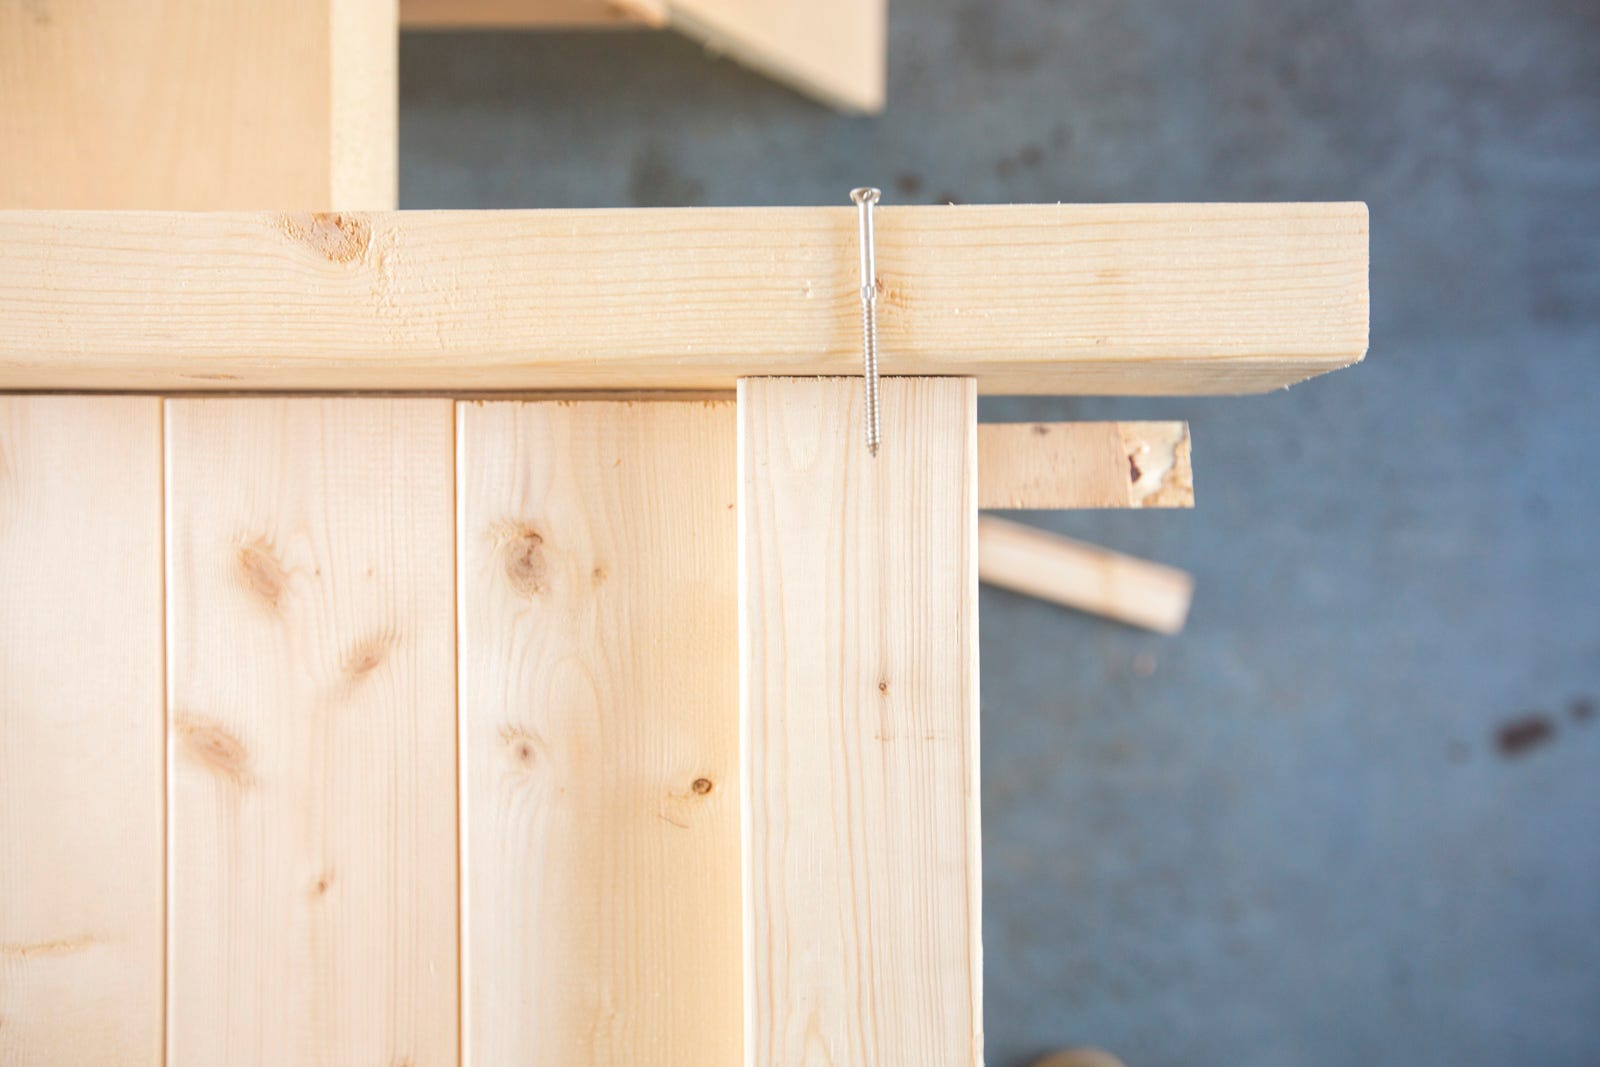
Now we’re ready to mount the horizontal, top piece of our headboard. This board is a 2" x 4" and will be mounted flat. We liked the proportion of sizing this piece so it overhangs the legs of the headboard by 3” on each side. If you’re in doubt of how long to make it, err on the long side. Try a length, dry-fit it into place and see how you like it. You can always shorten it.
Once you have determined your length, mark your board and cut it. Now, center the board side-to-side and mark the position. Before screwing the board in place, we ran a bead of carpenter's glue along the top of the plywood. To secure this board, we pre-drilled holes and then drove screws down vertically through the top of the board into the tops of each of the two side legs. We used two 3” screws on each side.


Step 5: Tack your 1" x 2"s in Place
We’re almost done with assembly! The last step was to tack two horizontal 1" x 2"s into place at the top and bottom of the T&G paneling. These pieces add visually to the look of the headboard and they hide the transition between the paneling and the bordering pieces. Use some carpenter’s glue and tack them into place with a few finish nails.
Step 6: Pick a Finish
You could use a clear finish like polyurethane, a product like Daly’s SeaFin over the natural wood, or stain first and then apply a finish coat. For our headboard we wanted a “whitewashed”, or “pickled” look, so we used Minwax’s water-based White Wash Wood Stain. It’s easy to use; following the directions on the can, we applied the “stain” and then wiped it off to get the look we desired. Wipe hard and you can leave just a hint of white, or apply heavier and wipe with less force if you want a look that has more pigment. After that stain treatment was dry, we applied Varathane’s Crystal Clear odorless polyurethane in a satin finish.
Step 7: Secure the Headboard
As a final step, we measured the distance between the holes of our bedframe, marked and drilled holes through the bottom of the headboard’s legs, and used some carriage bolts, nuts, and washers to secure the headboard to the metal bed frame.
Step 8: The Guest Room Awaits!

