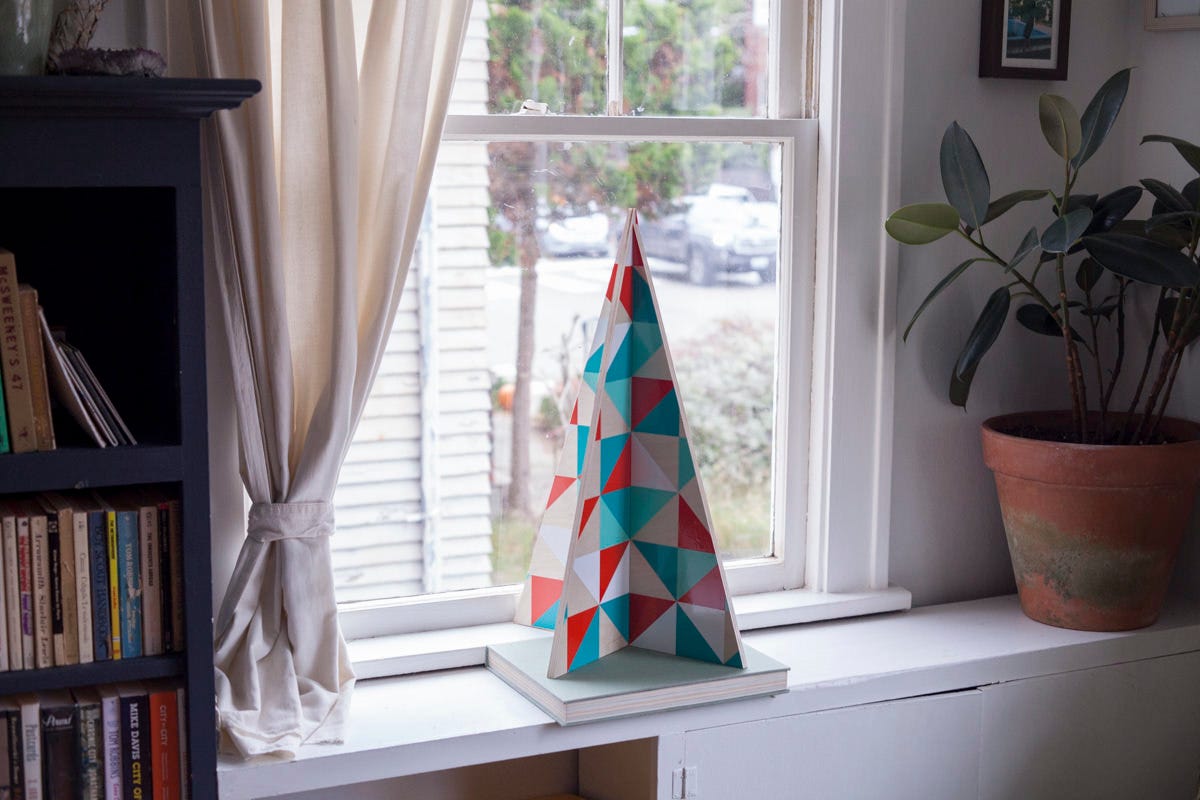

"This geometric Christmas tree is sure to turn the heads of any guests you have during the holiday season."
Now that December is finally here, it’s officially the universally accepted time to have a Christmas tree in your home. And if you’re anything like me, one tree just won’t do. These simple, mid-century-esque geometric trees fit together like a puzzle with dowel pins and drilled holes, and can be scaled to any size, and can be made to perfectly coordinate with the colors in your home. You can make one or two for a festive table topper, or create an entire forest on your living room floor. Then, when the season's over, pack it flat and store it away. Thanks for the inspiration, Create Gift Love!

Step 1: Measure and Tape Plywood
For this project, we used a quarter sheet of ½” plywood. You can make two 24 inch trees or one 36 inch tree out of this. Measure and mark the points of the triangle and then tape along these lines, drawing a line for a guide on top of the tape. The reason for the tape is that we want a really smooth cut for this tree and having the saw cut through the tape actually helps keep the wood grains in place and prevents breakage.


Step 2: Cut Plywood
Clamp the plywood to sawhorses (or a workbench) and cut. You should end up with two right triangles and one isosceles.

Step 3: Sand
Sand the edges of the plywood with a fine/medium sanding sponge or with 150-grit sandpaper.

Step 4: Mark Holes for Dowel Pins
We’ll use dowel pins to hold the triangles together. Take the isosceles triangle and mark the middle of the base, then draw a line up the center. From the top, mark the centerline at 4 inches and 7 inches. From the bottom, mark at 2 inches and 5 inches. These will be your four drill points.
Along the inside of the edges of one of the right triangles, mark 4 inches from the top and 5 inches from the bottom.
On the other right triangle, mark 7 inches from the top and 2 inches from the bottom.

Step 5: Drill
Place the isosceles triangle on top of a piece of scrap wood and drill four holes all the way through the plywood using a ¼” drill bit (drilling into another piece of wood makes for a cleaner hole with less splinters). Be sure to keep the drill straight up and down as you drill.
Measure ¾” from the tip of the drill bit and mark with a piece of tape. Drill holes, following the pencil marks on the inside edges of the right triangles. Go slow and be careful not to break through the face of the plywood on either side.
Sand away any splinters caused by drilling.


Step 6: Add Dowel Pins
Fit dowel pins into the holes on the inside edge of the right triangles. Line them up with the corresponding holes in the isosceles triangle to make sure everything fits together like it should before hammering the pins into place with a rubber mallet. It's important to make sure it fits first, because once hammered in it's unlikely you'll ever be able to get the pins out again. If for some reason though you don't have a tight fit, use some wood glue to keep them in place.

Step 7: Cut Out Shapes
We’re making the geometric pattern with contact paper. To start, lay out your contact paper face up. We used a rotary cutting mat for this step and took advantage of its grid. If you don’t have one, you can make your own grid on an old cutting board, a scrap of plywood, or your workbench (if you don’t mind marking it up). For this step, having a grid really sped up the process because we didn't want to mark up the surface of the contact paper.
Line up your contact paper and use a ruler against the grid as a guide for your utility knife. Cut out a grid of 3” squares and then cut the squares in half, into triangles. A fresh blade on your knife is key to not tearing up the vinyl. Ideally, you’ll cut through the vinyl, but not all the way through the paper backing so that it stays together while you continue cutting.

Step 8: Arrange and Attach Triangles
Now it’s time to lay out the design. First, on the isosceles triangle, measure out from either side of the centerline ¼” and mark: This is the center strip that will be covered up when the tree is assembled. Use it as a guideline for lining up your vinyl triangles.
Next, loosely arrange your triangles on the tree. We used four different sheets of 12” x 12” contact paper, which left us with about 16 triangles for each of the small triangles. Some of these triangles will be cut off and can be reused. Once the triangles are arranged, remove the backing and start sticking—just make sure your seems meet at the very top where the points of the ‘half-triangles’ end.


Step 9: Trim Excess Contact Paper
To trim excess contact paper, hold the contact paper taut, then run your utility knife along the edge of the plywood. This creates a really clean line—much better than you can get with a pair of scissors. You can stick the excess contact paper back onto one of the backings and reuse in another section.


Step 10: Assemble
Attach the two, smaller, right triangles onto either side of the larger, isosceles triangle by fitting the dowels into their corresponding holes.
This geometric Christmas tree is sure to turn the heads of any guests you have during the holiday season, and you'll enjoy the way it adds seasonal color and a festive twist to any room in your home.
