
"“The connections in Trex lighting are simple push-into-place fittings and you don’t need to have electrical experience to install any of it.”"
Materials
From patio lights to garden lights, exterior lighting is a popular upgrade for homes, and for good reason—it not only showcases your house and yard, but it also provides extra security. Today we’re installing Trex landscape lighting, which are some of the easiest we’ve worked with. The connections are simple push-into-place fittings and you don’t need to have electrical experience to install any of it. Better yet, the landscape components can be mixed with deck lighting using the same power source.
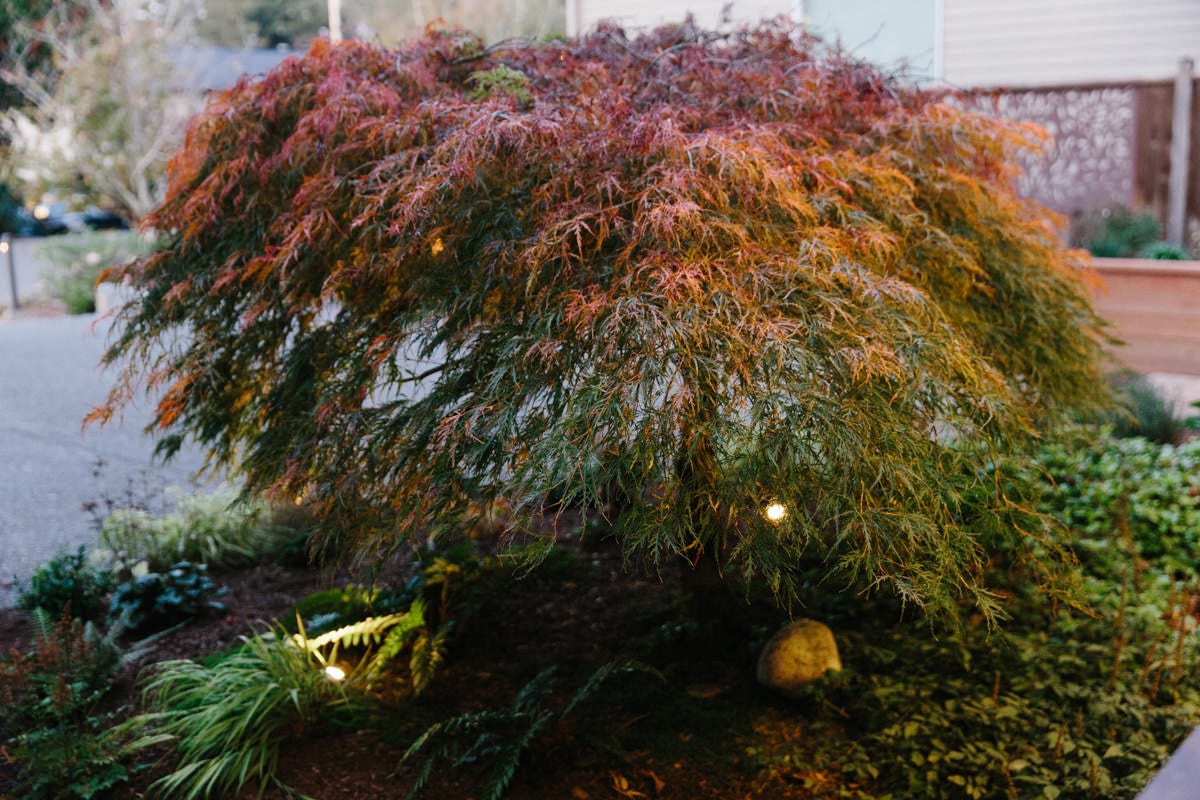
For our upgrade, we’re installing two outdoor lights: a spotlight to light a flagpole and two well lights to illuminate a Japanese maple tree. Let’s get started!
Step 1: Plan Placement of Lights and Wires
In sketching out a plan for where you will place your lights, start at the outside electrical outlet and work toward each individual light, taking measurements of how long your runs will be and what fittings will be needed. This will give you the added benefit of populating your shopping list to complete this project.
Our plan is to install one spotlight and two well lights, so in addition to the transformer/timer and the lights themselves, we’ll need a five-way splitter, a three-way adapter, and two 10’ cords.
Step 2: Lay Out Landscape Lights
Here’s where you really get a feel for things so you can make sure you have everything you need to connect it all together. Lay out your wires above ground, allowing slack for burying the wires later. For our application, we needed a five-way transformer hub, a 20’ wire, a three-way splitter, and a 10’ wire.


Step 3: Mount Timer and Transformer
Install your timer near your exterior electrical outlet at least a foot above the ground. Keep it unplugged for now. The timer is light-sensitive, so mount it vertically in a place with ambient light (this will allow the photocell to work properly). Next, mount the transformer nearby.


Step 4: Place Outdoor Landscape Lights
Now it really gets fun! Mount the lights in the spots you’ve selected. With Trex landscape lighting, this is generally as easy as pushing the posts of the fixtures into the ground. Our spotlight has a post, and our two well lights simply lay on the ground and secure with short spikes that come with them.


Step 5: Connect Spotlight
Leaving the timer unplugged, start connecting the wires for the lights starting at the transformer. The spotlight we’re using requires its own wire, so the first thing we plugged into our transformer was a five-way transformer hub. One of the five ends will lead to the spotlight and one will lead to the other two lights (three remain unused on our job). We plugged the end of the spotlight cord into one port on the hub and screwed the built-in collar in place. We screwed the spotlight’s in-line step-up transformer to a fence post that was nearby, but we could have buried it.


Step 6: Connect Well Lights
Our well lights are further away, so we loosely laid the 20’ extension wire from the transformer splitter to a spot near the location of the two well lights. The well lights come with a 70” cord, so we attached a three-way splitter at the end of the extension cord—and plugged the wires from the well lights into the three-way splitter, too. In other words, the long extension cord leads to a Y (think of it like a fork in the road) which then leads to both well lights.


Step 7: Test Outdoor Landscape Lights
Now that all our lights are hooked up, it’s time to test them. Plug in the timer and set the dial to on—hopefully everything lights up! Our lights did, but if yours don't, just troubleshoot by making sure your timer has power (you’ll see a green light) and then check all connections and wires if necessary. Before moving to the next step, unplug the timer.
Note: It’s best to test your lights after dusk. That way, you can see the way they’ll look at night and change or adjust your light placement now before you bury the wires.
Step 8: Bury the Wires
Before you bury the wires, I suggest sketching the path they take and tucking your sketch away for future reference. That way, you can steer around wiring if you add some plants later on. To bury the wiring, just cut a 3” deep path for the wires with the tip of a square-point shovel—be careful not to cut the wire with the shovel! Using your hands, tuck the wire down into the groove in the soil you just cut. Cover with dirt.


Step 9: Plug In and Turn On
You’re done! Plug in the timer and set its dial to “dusk to dawn” or one of the other settings that fits your needs.
These lighting components from Trex were a breeze to install. They’ve designed the fittings and components so well that even if you have zero electrical experience, your outdoor landscape lighting will look like it was installed by a pro. Happy upgrading!

